
If the bandwidth control option is missing from your TP-Link router's admin panel, the most likely cause is that your firmware or hardware version has replaced it with QoS (Quality of Service). The split happened around 2019, and it runs along hardware version lines, so a C6 v2 and a C6 v3 behave completely differently in the admin panel even though the box looks identical. For IT administrators managing shared networks where one department can quietly choke everyone else's connection, knowing which system your router actually supports is the only way to get traffic management working again.
Bandwidth Control was removed from most TP-Link firmware after 2019 and replaced by QoS or SmartQoS, depending on your model and hardware version.
Why the Bandwidth Control Option Is Missing on Your TP-Link Router
TP-Link made a deliberate change in its firmware architecture starting around 2019. The older Bandwidth Control feature, which let you set hard upload and download caps per device by IP address, was phased out in favor of QoS-based traffic prioritization. There are a few specific ways this plays out. On routers like the Archer C7 and C20, older firmware versions had Bandwidth Control under Advanced settings, but a major firmware revision removed it or folded it into the QoS menu. Newer Archer models, specifically the C6 v3 and later and the A7 v5 and later, shipped with a redesigned UI that skips Bandwidth Control entirely. The Deco mesh lineup is a separate case: the app-based interface has never included Bandwidth Control in any version, and device priority tiers are the only option.
The confusion is understandable because TP-Link kept the same model names across hardware revisions. That version number on the bottom label matters more than the model name when you're trying to figure out what your router actually supports.

Most network admins chasing this issue don't realize the hardware version is the deciding factor until they've already spent an hour poking through every menu. The model name gets all the attention, but the version number is what actually determines which firmware branch your router runs.
How to Enable Bandwidth Control on Legacy TP-Link Firmware
If you're on an older firmware that still supports it, here's the path through the admin panel.
Finding and enabling the setting
Open a browser and go to 192.168.0.1 or tplinkwifi.net. Log in with your admin credentials, then navigate to Advanced (or Advanced Setup) > Bandwidth Control. Check the box to enable it, then enter your actual ISP upload and download speeds. Don't round up or guess here, because the per-device limits you set are calculated as a percentage of these numbers.
Setting per-device rules
Click Add to create a rule, enter the IP address of the device you want to limit, then set the minimum and maximum bandwidth for both upload and download directions.
One thing that trips people up: these rules only work reliably if you assign static IP addresses to devices, either through DHCP reservation in your router or directly on the device. If a device's IP changes, the rule quietly stops applying and you won't get an error message telling you so. In shared office environments with BYOD devices cycling on and off the network, this becomes a real maintenance burden fast.
How to Use QoS as a Bandwidth Control Alternative on Newer TP-Link Firmware
SmartQoS on newer TP-Link routers doesn't let you set hard caps by megabit the way Bandwidth Control did. Instead, it manages bandwidth by priority: a lower-priority device gets less bandwidth when the network is congested but can still use the full connection when nothing else is competing.
To set it up, go to Advanced > QoS, toggle it on, and enter your total bandwidth to match your actual ISP speeds. You'll see connected devices listed, and you can assign them to High, Medium, or Low priority buckets.
The practical tradeoff is real. Bandwidth Control was a hard ceiling. QoS is a flexible lane system.
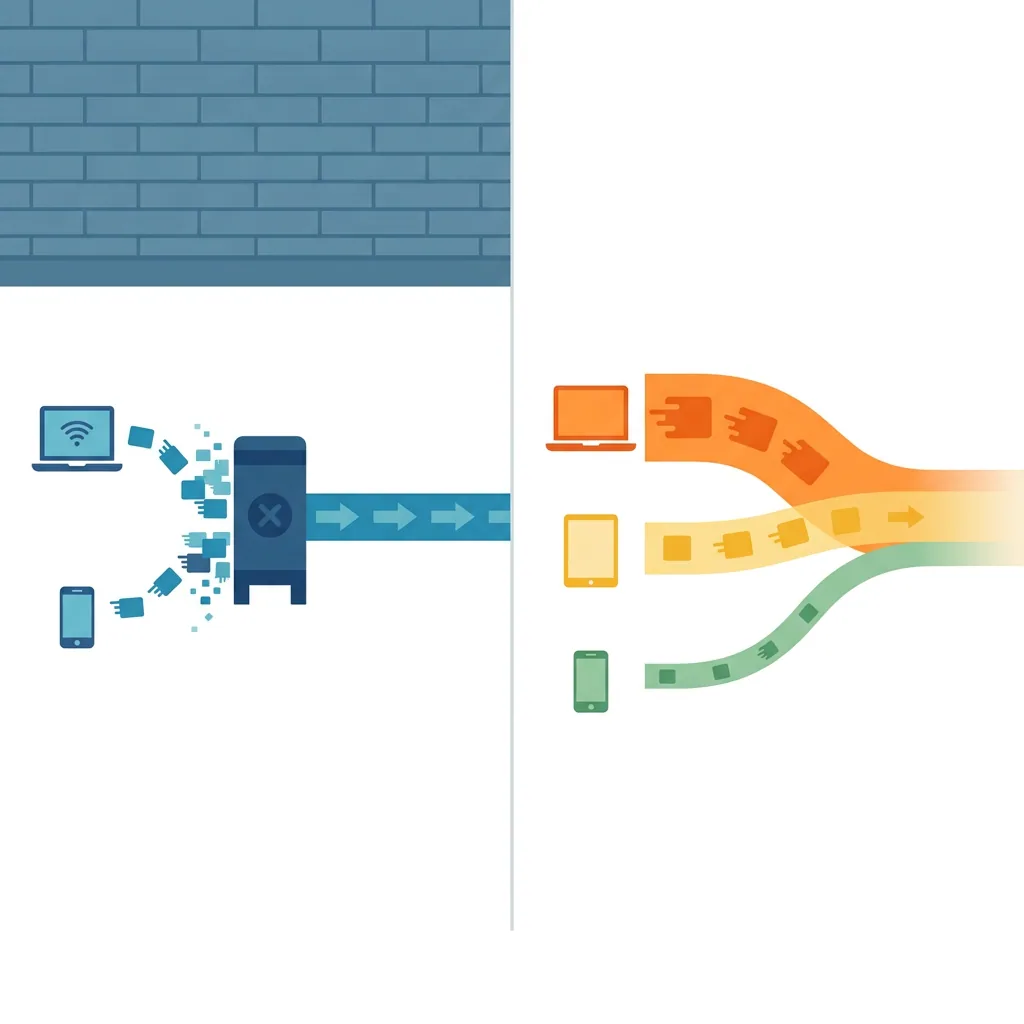
For most shared network environments, QoS actually works better, because strict caps tend to cause buffering and stalls for legitimate high-priority traffic like video calls or cloud applications that your team depends on. The one scenario where you genuinely miss Bandwidth Control is when you need to guarantee a specific device can never exceed a set limit regardless of network conditions, which matters when one user's bulk file transfer is quietly killing everyone else's performance during business hours.
The firmware that removed Bandwidth Control is almost always the same update that added device-level speed test results to the QoS screen, which makes it easier to spot the actual bottleneck rather than guessing at cap values. That's a genuine improvement most people overlook while they're busy hunting for the old menu.
If you're on newer TP-Link firmware and need true hard caps per device, look into OpenWrt, which supports Archer C6 and A7 hardware and gives you per-device rate limiting that goes well beyond what either Bandwidth Control or SmartQoS offered, or consider a dedicated bandwidth management tool like Perimetery PRO, which enforces persistent per-device policies at the network level without touching individual device settings at all.
Common Fixes When Bandwidth Control Still Doesn't Appear
If your router model should support Bandwidth Control but you still can't find it, start by confirming you're actually on the legacy firmware. Log in and check System Tools > Firmware Upgrade to see your current version. The TP-Link support page for your model lists every available firmware version, including older ones you can flash back to. Downgrading is supported by TP-Link and doesn't void the warranty on most models.
Second, verify the hardware version printed on the label on the bottom of the router. Flashing firmware built for a different hardware revision is the fastest way to turn a missing menu option into a much bigger problem, so match both the model name and the version number exactly before downloading anything.
If Bandwidth Control genuinely isn't available for your hardware version, QoS handles the job well enough for most situations, and once you've worked with it for a week, the priority-based approach tends to make more sense than fixed caps for a network where device mix and usage patterns shift throughout the day.
Frequently asked questions

See every device on your network
Perimetery PRO shows live upload and download per device, and lets you cap or block any of them in one click. Runs on one Windows machine, no agents to deploy.
See pricing